The Ultimate Guide to Installing Trailhead Composite Decking
Introduction to Trailhead Composite Decking
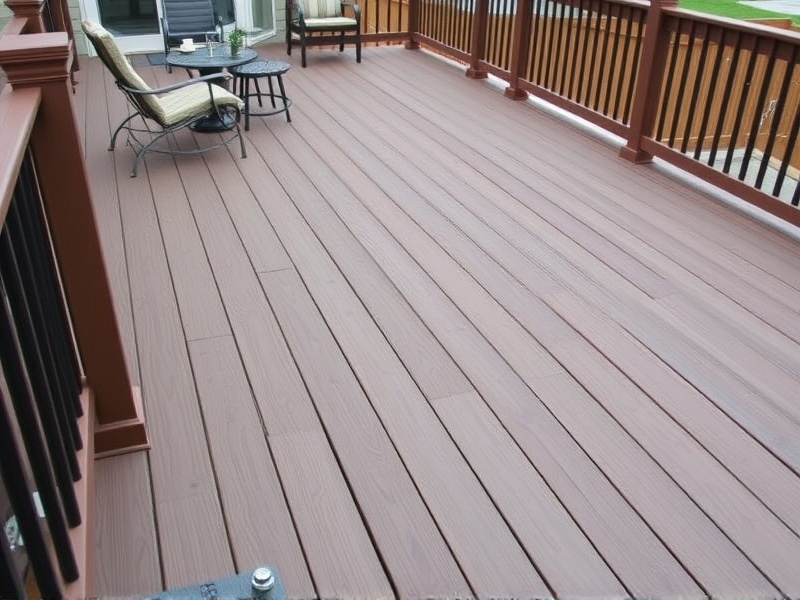
Trailhead composite decking is a popular choice among homeowners looking for low-maintenance, durable, and aesthetically pleasing outdoor flooring options. This type of decking material combines the beauty of wood with the durability and longevity of modern composites, making it an excellent investment for any home improvement project. In this comprehensive guide, we will walk you through the entire process of installing Trailhead composite decking, from gathering the necessary tools to achieving a professional finish.
Necessary Tools and Materials
To ensure a smooth and efficient installation process, you’ll need the following tools and materials:
- Measuring tape
- Level
- Drill
- Screwdriver
- Circular saw or miter saw
- Composite deck screws
- Trailhead composite decking boards
- Joist hangers (if required)
- Weatherproof sealant
Preparation Steps
Before diving into the installation process, it’s essential to prepare your work area. Start by clearing the area where the decking will be installed and ensuring that the surface is level. Next, measure and mark the dimensions of the deck, taking note of any obstacles such as trees or existing structures. It’s also crucial to check the weather forecast to avoid rainy days that could delay your project.
Installation Process
The installation process of Trailhead composite decking can be broken down into several key steps:
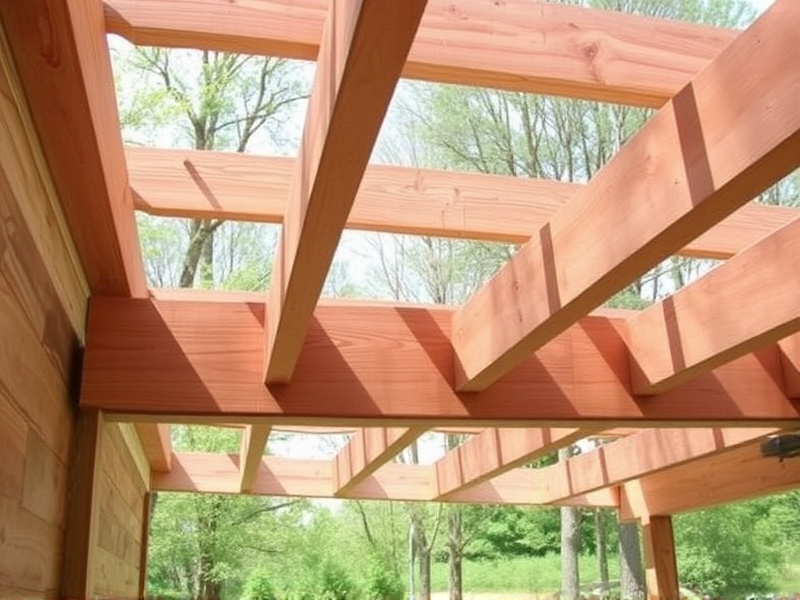
Step 1: Laying the Foundation
Begin by laying out the joists, ensuring they are spaced evenly according to the manufacturer’s recommendations. Use joist hangers to secure the joists to the ledger board and posts, if applicable. Make sure everything is level and secure before proceeding.
Step 2: Cutting and Installing Boards
Cut the Trailhead composite decking boards to size using a circular saw or miter saw. Start installing the boards from one end of the deck, working your way across. Ensure each board is snug against the previous one and use composite deck screws to attach them securely to the joists. Remember to leave a small gap between boards for expansion.
Step 3: Finishing Touches
Once all boards are installed, apply a weatherproof sealant to protect the deck from moisture and UV rays. This step is crucial in maintaining the appearance and longevity of your new Trailhead composite decking. Inspect your work for any gaps or uneven areas and make adjustments as needed.
Tips for Achieving a Professional Finish
To achieve a professional-looking result, consider these additional tips:
- Always follow the manufacturer’s instructions regarding installation techniques and recommended products.
- Use a chalk line to ensure straight lines when cutting and installing boards.
- Keep a consistent gap between boards to maintain a uniform look.
- Regularly check the level of the deck during installation to avoid any uneven areas.
Conclusion
Installing Trailhead composite decking can be a rewarding DIY project, but it requires careful planning and attention to detail. By following this comprehensive guide, you can successfully install your own beautiful and long-lasting composite deck. Remember, patience and precision are key to achieving a professional finish.

Reviews
There are no reviews yet.