Installation Tips for Millboard Composite Cladding
Introduction to Millboard Composite Cladding
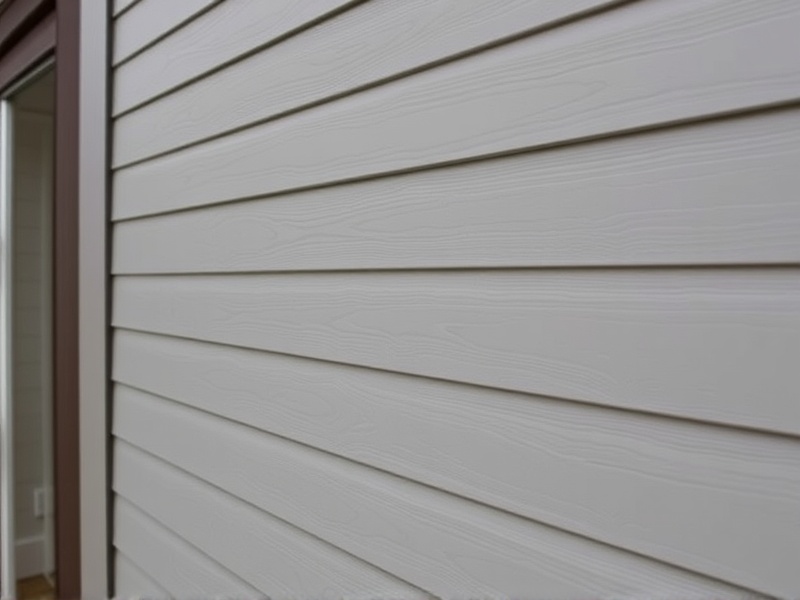
Millboard composite cladding is a popular choice for home exteriors due to its durability, low maintenance, and aesthetic appeal. It’s made from a combination of wood fibers and plastic, which gives it the look of natural wood without the need for constant upkeep. Installing millboard composite cladding can seem like a daunting task, but with the right tools and a bit of patience, you can achieve professional-looking results. This article provides a comprehensive guide to the installation process, from preparation to finishing touches.
Step-by-Step Installation Process
Preparation
The first step in installing millboard composite cladding is to prepare the surface where the cladding will be installed. Ensure that the wall is clean, dry, and free from any debris or loose paint. If the wall is uneven, use a leveling compound to create a smooth base. Measure the area to be covered and calculate the number of boards needed, allowing for a 5-10% overage to account for waste and cuts. Always refer to the manufacturer’s guidelines for specific requirements and recommendations.
Cutting the Boards
Using a fine-toothed saw, carefully cut the millboard composite cladding to size. It’s advisable to wear protective gear such as gloves and safety glasses when cutting. Cut each board to fit the dimensions of your project, making sure to leave a small gap between each board for expansion. Pre-drill holes for screws to avoid splitting the material. For precise cuts, consider using a jigsaw or a circular saw with a fine blade.
Fitting the Boards
Start by laying out the first row of boards horizontally at the bottom of the wall. Use galvanized screws to attach the boards to the substrate, spacing them approximately 16 inches apart. Stagger the joints of the boards to ensure a more secure and aesthetically pleasing finish. Use a level to check that each row is straight and even before securing it in place. Pay close attention to the alignment and spacing to maintain a uniform appearance across the entire surface.
Finishing Techniques
To complete the installation, seal the edges and joints with a compatible caulk or sealant. This not only enhances the appearance but also protects against moisture intrusion. Trim pieces can be added around windows, doors, and corners for a finished look. Ensure that all gaps are sealed properly to prevent water damage and prolong the lifespan of the cladding. Regular maintenance, such as cleaning with mild soap and water, will help keep the millboard composite cladding looking new for years to come.


Reviews
There are no reviews yet.