WPC Klick Flooring 90×30: Installation Tips and Tricks
Introduction
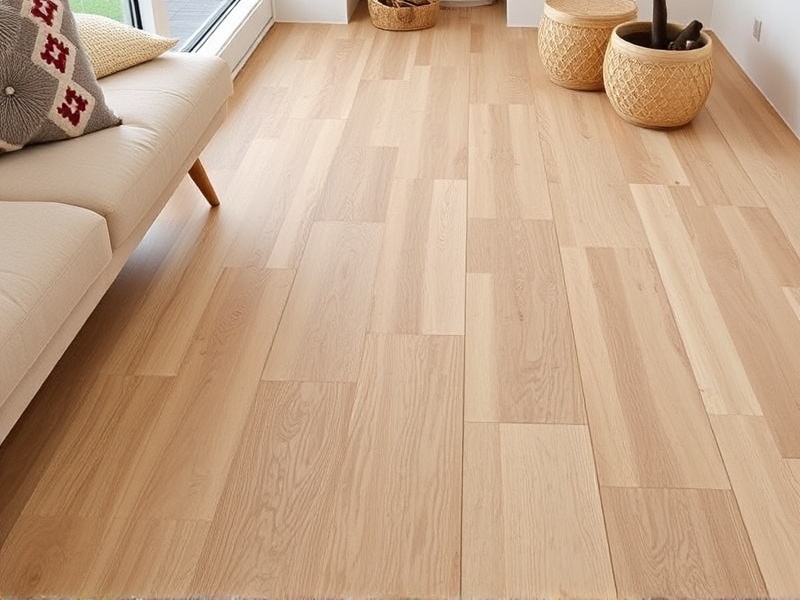
Welcome to our comprehensive guide on installing WPC (Wood Plastic Composite) Klick Flooring 90×30. This innovative flooring option combines the beauty of wood with the durability of plastic, making it an excellent choice for both residential and commercial spaces. The 90×30 format is particularly popular due to its ease of installation and versatility. In this article, we will cover the essential tools needed, preparation steps, and common pitfalls to avoid during the installation process.
Tools Needed
To successfully install your WPC Klick Flooring 90×30, you’ll need a few key tools:
- A tapping block: Essential for gently tapping planks into place without damaging them.
- A utility knife: Useful for trimming excess material.
- A measuring tape: For accurate measurements and cutting.
- A level: To ensure the floor remains even.
- A pry bar: Helps in removing old flooring if necessary.
Preparation Steps
Before diving into the installation, take some time to prepare your space:
- Measure the room: Accurately measure the length and width of each wall to determine how much flooring you’ll need.
- Remove existing flooring: If replacing old flooring, carefully remove it using a pry bar.
- Inspect the subfloor: Ensure that the surface is clean, dry, and level. Any uneven areas should be corrected before laying down the new flooring.
- Allow the flooring to acclimate: Unpack the flooring and leave it in the room where it will be installed for at least 48 hours. This helps the material adjust to the room’s temperature and humidity levels, reducing the risk of warping or shrinking after installation.
Tips for Successful Installation
Follow these tips to ensure a smooth installation process:
- Start from a straight wall: Begin installation along the longest straight wall in the room to achieve a more professional look.
- Leave expansion gaps: Always leave a small gap (about 1/4 inch) around the edges of the room to allow for expansion. This prevents buckling when the flooring expands or contracts due to changes in temperature or humidity.
- Use spacers: Place spacers along the walls to maintain consistent spacing throughout the installation.
- Secure the first row: Use a tapping block to secure the first row of planks tightly against the wall, ensuring they are perfectly aligned.
- Stagger joints: Avoid aligning the joints between planks in consecutive rows directly over one another. Instead, stagger them slightly to create a more aesthetically pleasing pattern.
Common Pitfalls to Avoid
Here are some common mistakes to avoid during installation:
- Ignoring moisture content: Installing the flooring without allowing it to acclimate can lead to warping or cupping later on.
- Not leaving enough expansion space: Failing to leave adequate gaps around the perimeter can result in buckling or lifting of the flooring.
- Misalignment of joints: Poor alignment of joints not only looks unprofessional but also compromises the structural integrity of the floor.
- Over-tapping: Using excessive force when tapping planks into place can damage the locking mechanism or cause cracks in the material.
Conclusion
Installing WPC Klick Flooring 90×30 is a straightforward process if you follow the right steps and precautions. By preparing your space adequately, using the correct tools, and following best practices, you can achieve a beautiful, durable floor that enhances any room. Remember to always refer to the manufacturer’s guidelines for specific recommendations and safety measures.


Reviews
There are no reviews yet.