WPC Interior Wall Paneling Installation Guide
Introduction
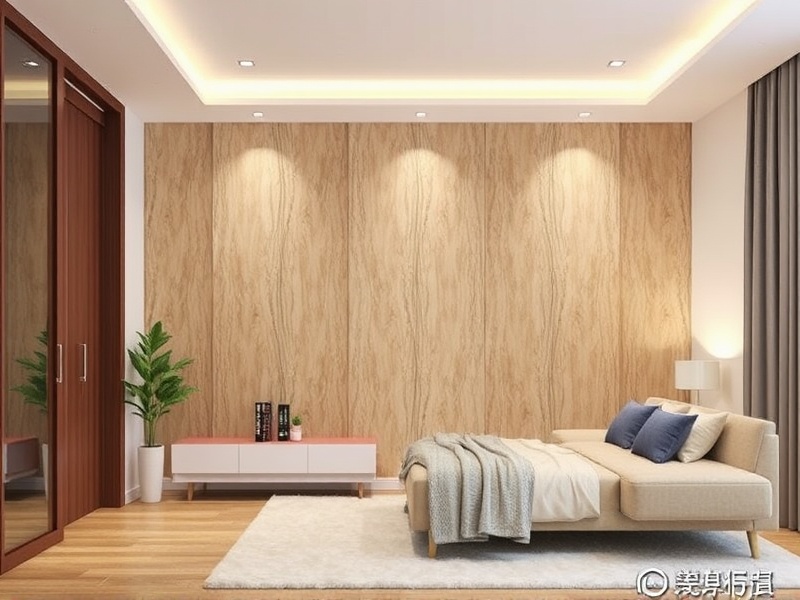
Wood Plastic Composite (WPC) interior wall paneling is becoming increasingly popular for its durability, low maintenance, and eco-friendly properties. This comprehensive guide will walk you through the entire process of installing WPC interior wall panels, from initial measurements to the final touches. Whether you are a DIY enthusiast or a professional installer, this article will provide you with detailed instructions and helpful tips to ensure your project goes smoothly.
Measuring and Planning
The first step in any successful installation is accurate measurement. Measure the walls where you plan to install the WPC panels using a tape measure. Record these dimensions carefully, ensuring you account for any windows, doors, or other obstacles. It’s advisable to add a few extra inches to each dimension to allow for adjustments during installation. Once you have your measurements, plan the layout of the panels. Consider how the panels will align with the room’s features and ensure that joints fall in less noticeable areas.
Cutting Panels
Before cutting the panels, gather all necessary tools including a circular saw, measuring tape, pencil, and safety gear such as goggles and gloves. Mark the cutting lines on the panels with a pencil according to your measurements. Use a circular saw set at a 45-degree angle to create beveled edges if desired, which can enhance the aesthetic appeal of your installation. Always follow the manufacturer’s guidelines for cutting WPC panels to avoid damaging them.
Attaching Panels
Begin by preparing the wall surface. Ensure it is clean, dry, and free of debris. Apply a primer if needed to improve adhesion. Start attaching the panels from one corner of the room, working your way across and up. Use appropriate fasteners recommended by the manufacturer, such as screws or nails, and ensure they are countersunk below the surface to maintain a smooth finish. Leave a small gap at the bottom for expansion. For best results, stagger the joints between panels to reduce visibility.
Safety Precautions
While installing WPC panels, prioritize safety. Wear protective gear like goggles and gloves to prevent injuries from sharp edges or dust particles. Ensure the workspace is well-ventilated, especially when cutting materials that may release harmful fumes. Keep tools out of reach of children and pets, and store them properly after use.
Troubleshooting Tips
Encountering issues during installation is not uncommon. If you notice gaps between panels, adjust the spacing or consider using a specialized adhesive. For uneven surfaces, use shims or fillers before attaching the panels. Should the panels warp or bow, check if they were exposed to excessive moisture or heat. Proper storage and handling can prevent these issues.
Finishing Touches
Once the panels are securely attached, it’s time to apply a finishing touch. Use a sealant or paint designed for WPC materials to protect the panels and enhance their appearance. Choose colors and finishes that complement the room’s decor. Finally, clean up the work area, removing any debris or excess materials.
Conclusion
Installing WPC interior wall panels is a rewarding project that can transform the look and feel of any space. By following this guide, you can achieve professional results while enjoying the benefits of durable, low-maintenance, and environmentally friendly wall coverings. Remember to take your time, measure twice, and always prioritize safety throughout the process.

Reviews
There are no reviews yet.