Bally WPC Driver Board Power AUX: Installation and Configuration Tips
Introduction
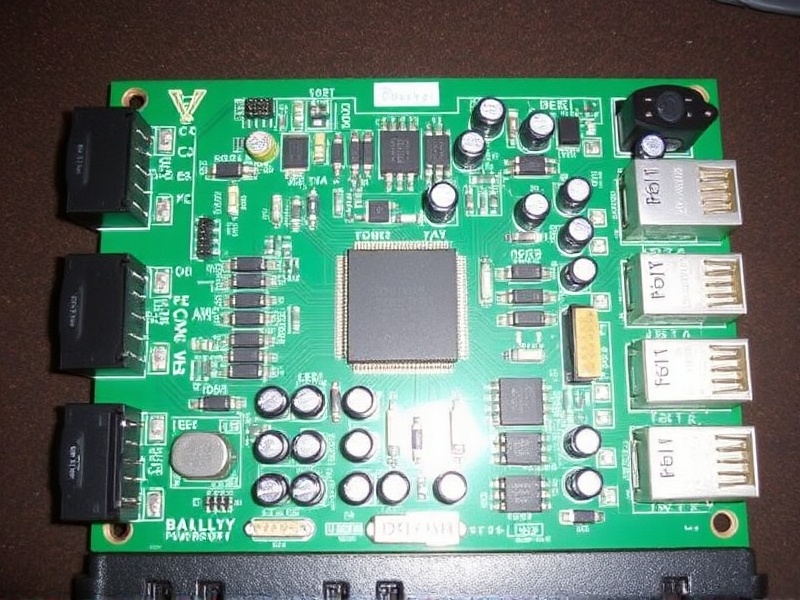
The Bally WPC (Williams Pinball Controller) system is renowned for its reliability and performance in pinball machines. One crucial component in this system is the Power AUX board, which provides additional power outputs essential for the operation of various game features. This guide aims to provide a comprehensive overview of installing the Power AUX board, ensuring your pinball machine runs smoothly and efficiently.
Necessary Tools and Safety Precautions
To install the Bally WPC Driver Board Power AUX, you will need a few basic tools such as a screwdriver, wire strippers, and a multimeter. Before starting, ensure that the pinball machine is unplugged from any power source to avoid electrical hazards. Additionally, wear appropriate protective gear like gloves and safety glasses to protect yourself from potential injuries during the installation process.
Installation Process
Begin by identifying the location where the Power AUX board will be installed. Typically, it should be mounted near the main controller board for easy access to power connections. Once the mounting location is decided, secure the board using screws or adhesive strips depending on the design of your machine.
Next, connect the power cables from the main controller board to the Power AUX board following the manufacturer’s guidelines. Ensure all connections are tight and secure to prevent any loose contacts that could cause malfunctions. Use a multimeter to check for continuity and correct voltage levels at each connection point before proceeding further.
Configuration Settings
After physically connecting the Power AUX board, it’s time to configure it according to your specific requirements. Access the Bally WPC software interface and navigate to the settings related to the Power AUX board. Here, you can adjust parameters such as output voltages, current limits, and response times based on the needs of your particular pinball machine setup.
It is advisable to consult the user manual provided with the Power AUX board for detailed instructions on how to set these configurations correctly. Incorrect settings might lead to suboptimal performance or even damage to connected components.
Testing Procedures
Once everything is configured, perform thorough testing to verify that the Power AUX board is functioning as expected. Start by powering up the entire system and observing if there are any immediate issues like flickering lights or malfunctioning solenoids. Gradually test each feature that relies on the Power AUX board’s outputs, making sure they operate smoothly without any hitches.
If any problems arise during testing, revisit the wiring and configuration settings to identify and rectify the issue. Document all steps taken during troubleshooting for future reference and ease of maintenance.
Conclusion
Installing and configuring the Bally WPC Driver Board Power AUX requires careful attention to detail and adherence to safety protocols. By following the outlined steps and taking the time to properly test the setup, you can ensure that your pinball machine operates reliably and efficiently. Remember, proper documentation and understanding of the system will greatly aid in maintaining and upgrading your pinball machine in the long run.


Reviews
There are no reviews yet.